Author: Lawrence Albert Pardo-Ilao - Naga City, Philippines

Free! Guitar Tutorials and Chords!

New! VB.NET HTML5 and CSS3 Tutorials!

Unlock For Us

Automatically expand to current folder at Navigation Pane

folderoption

When you browse any main folder with files and folders inside, the Navigation Pane Tree automatically shows or expand. That is the function of the said option. Anyway, let’s dig what’s happening in Windows registry for technical documentation.

How to activate the automatic expand for folders feature at Windows Explorer

Open your Windows Explorer by pressing Win + E keyboard shortcut and press Alt-T + O and folder option window will appear. At the bottom part, click to check the option “Automatically expand to current folder” and Apply.

As you browse any folder, it will automatically expand at the Tree View Navigational part.

Where to look at your registry for the said option

Just proceed to the path below and study the registry setting:

HKEY_CURRENT_USER\Software\Microsoft\Windows\CurrentVersion\Explorer\Advanced

NavPaneExpandToCurrentFolder = 0 (deactivate) or 1 (activate)

automaticexpand

That’s it! you can add the option to your RegDevelop application and guides…

Keep on reading!


Read more...

Unlock For Us

Hardware Requirements and Screenshots of Windows 8 Release Preview

Windows 8 Pre-Release Edition is a new version of Windows that focuses on touch devices and several technologies behind slim-type computers. The Preview build works great on the same hardware that Windows 7 have.

Here’s the quick list:

  • Processor: 1 gigahertz (GHz) or faster
  • Memory: 1 gigabyte (GB) (32-bit) or 2 GB (64-bit)
  • Hard disk space: 16 GB (32-bit) or 20 GB (64-bit)
  • Graphics card: Microsoft DirectX 9 graphics device with WDDM driver
  • tablet or monitor that supports multi-touch.

Screenshots of Windows 8 installation

The Windows 8 logo

installing

Don’t forget to get and enter the serial key in this download page.

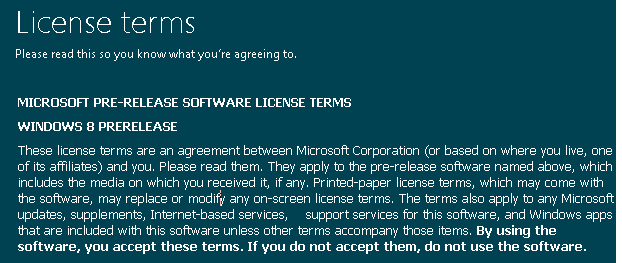
Terms

35cense

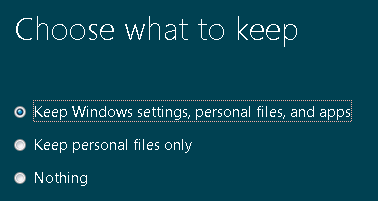
Upgrading to Windows 8

4grade

Enjoy!


Read more...

Unlock For Us

Creating a Startup Drive for Windows 8 flash drive Installer

Want to install Windows 8 with your flash drive? The article is very interesting and really needed for those people using mini-laptops (or so called netbooks), tablets and next generation of computers where dvd’s and floppy drives is not anymore applicable, so let’s try to create a startup disk (bootable drive) for Windows 8.

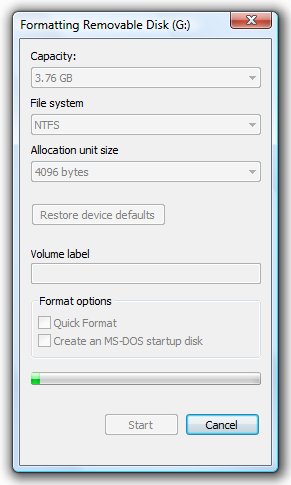
Prepare your portable drive and format the removable disk as NTFS:

formatdisk

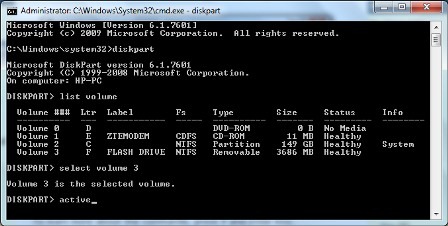
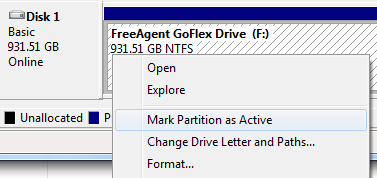
Next, open the command prompt as administrator and let’s make the drive partition as Active.

In the command prompt, type diskpart and press enter.

diskpartactive

Wait for a while and let’s display all the drives and partitions using the comand list volume. Find the volume which the usb drive is located and use the command select volume 3 (in my case, its 3!). Press enter and type active. That’s it!

For those people who doesn’t know how to use these DOS commands,  try formatting and setting the partition as Active using Computer Management Tools > Storage > Disk Management.

management

The final steps - Let’s create a Boot Sector and copy all the files in Windows 8 installer to your flash drive set as active partition.

To create a boot sector, go to the folder where the directory \Boot is located. You can use any Windows Vista, Windows 7 and Windows 8 installer and go to the Boot directory and type:

bootsect(space)/nt60(space)Flash Drive Letter

C:\Windows\System32>d:

d:\>cd boot

d:\BOOT>bootsect /nt60 f:

and wait for these message to appear:

Successfully updated NTFS filesystem bootcode

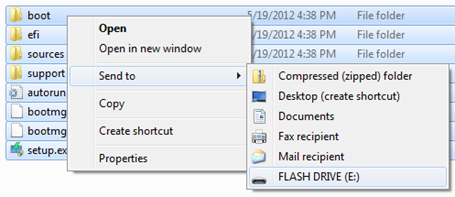
Finally, go to the partition where your windows 8 installer is located and copy the files to your flash drive.

copyfilestodrive

Cool?! Keep on reading!


Read more...


© UnlockForUs 2007-2022 | Blogger| License Agreement